

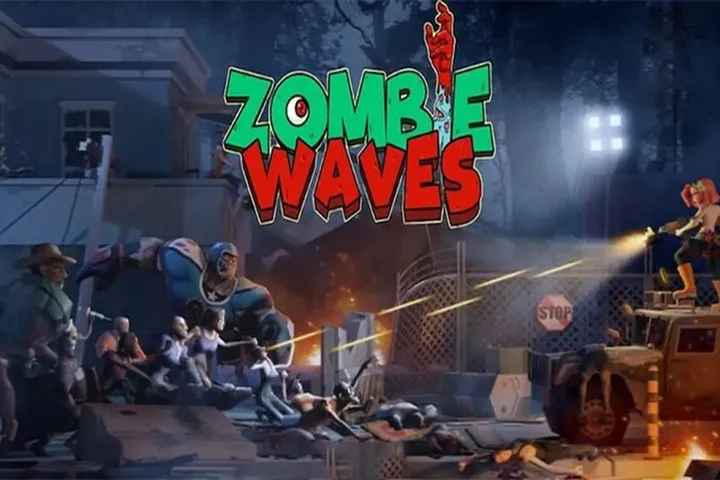
Surviving the Infinite Horde: A Master’s Guide to Zombie Waves Optimization
In the saturated world of mobile roguelike shooters, Zombie Waves stands out not because of its premise, but because of its mathematical complexity. At first glance, it appears to be a simple "bullet heaven" survival game, but once you surpass Stage 30, the game shifts into a rigorous test of statistical synergy and resource management. To succeed, a player must transition from a casual survivor to a strategic architect, understanding that victory is determined long before the first bullet is fired—it is won in the gear menus, the laboratory, and the precise selection of trait branches during the heat of battle.
1. The Pre-Combat Blueprint: Gear Synergy and Base Stats
Success in Zombie Waves is built on a foundation of Attack (ATK) and Critical Rate. Unlike many RPGs where defensive stats can carry you through mistakes, the infinite scaling of the zombie horde means that "killing is the only defense." Your primary focus should be on the synergy between your weapon choice and your equipment sets. For instance, the S-Tier "Crimson Abyss" set provides a massive boost to reload speed and fire rate, which is essential for weapons with low magazine capacity but high impact.
When upgrading gear, prioritize your Weapon and Ring slots. The Weapon slot provides the raw ATK necessary to break through the "Health Walls" of late-game elites, while the Ring usually dictates your Critical Damage multiplier. A common mistake is spreading resources evenly across all gear; instead, follow a 2:1 ratio—invest twice as much gold and blueprints into your offensive slots as you do into your HP-focused armor and boots. This ensures you maintain a "One-Shot" threshold against standard runners for as long as possible.
2. Weapon Archetypes: Choosing Your Tool of Destruction
The weapon you bring into a stage dictates your entire build path for the next 12 minutes. The Voltgun is the current meta-king for crowd control due to its chain-lightning properties, while the Boreas (and its evolved forms) excels at boss-killing through piercing wind shells. Understanding the "Fire Rhythm" of your weapon is crucial. For example, using the RPG requires a "Kiting" movement style where you lead the pack into a tight cluster before firing, whereas the SMG rewards a "Circle Strafe" approach.
Tiered Weapon Analysis
- S-Tier (The Arbalest/Voltgun): High scaling, excellent synergy with elemental traits.
- A-Tier (Boreas/Pulverizer): Great for specific stage layouts, particularly narrow corridors.
- B-Tier (Standard Shotgun/AK): Reliable for early game but falls off due to lack of innate piercing or AOE.
3. The Holy Trinity of Traits: Power, Speed, and Frequency
Once the wave begins, your first five trait selections will determine the "run viability." Every veteran player looks for the "Holy Trinity": Fire Rate, Bullet Damage, and Reload Speed. In Zombie Waves, these three stats act multiplicatively. If you only increase damage, your DPS (Damage Per Second) grows linearly; if you increase damage and fire rate simultaneously, your DPS grows exponentially.
Prioritizing Trait Branches
- The Power Branch: Focus on "Big Bullets" to increase hitboxes, making it harder to miss fast-moving targets.
- The Frequency Branch: High fire rate is essential for "on-hit" procs, such as the chance to freeze or burn.
- The Agility Branch: Movement speed isn't just for dodging; it increases your "Collection Radius," allowing you to grab XP gems without diving into the center of a pack.
4. Elemental Mastery: Calculating Damage Over Time (DoT)
Elemental traits—Fire, Frost, and Lightning—are not just visual flairs; they are the keys to surviving the 10-minute mark. Frost is arguably the most important defensive element because it applies a "Slow" debuff. In higher stages, zombies move faster than the player character’s base speed, making Frost-induced crowd control mandatory. Lightning, conversely, provides the best AOE (Area of Effect) clearing, jumping between enemies to soften up the backline.
Elemental Synergies to Watch For
- Frost + Shatter: Increases damage dealt to frozen targets by 50%.
- Fire + Explosion: Causes enemies killed by burn damage to explode, dealing 20% of their max health to neighbors.
- Lightning + Conductivity: Increases the number of jumps your chain lightning can perform.
5. The Ultimate Evolution: Understanding Trait Fusions
The true power spike in Zombie Waves comes from "Fusion Traits." These are hidden combinations that unlock massive bonuses when you have specific prerequisite traits at their maximum level. For example, the "Divine Light" fusion requires maxed-out Healing and Bullet Size, providing a persistent aura that damages enemies while healing the player. Knowing these recipes is what separates a Stage 50 player from a Stage 100 player.
Key Fusion Recipes
- Reaper’s Breath: Requires Max Bullet Damage + Max Curse. Allows bullets to execute enemies below 15% HP instantly.
- Thunder Goddess: Requires Max Lightning + Max Fire Rate. Every 10th bullet summons a massive lightning strike.
- Frostfire: Requires Max Frost + Max Fire. Your bullets apply both burn and slow, and frozen enemies take massive fire damage.
6. Boss Mechanics: Managing the Elite Threat
Every three minutes, a boss or elite zombie will spawn. These enemies have high resistance to knockback and can often dash. The strategy here is "Target Isolation." You must clear a path through the smaller zombies using your AOE skills to create a "dueling space." If you are surrounded by small fry while trying to dodge a boss's projectile, you will likely take fatal damage.
Boss Attack Patterns
- The Charger: Moves in straight lines; dodge perpendicular to its path.
- The Spitter: Creates zones of toxic sludge; stay on the move to prevent the floor from becoming entirely "Dead Zones."
- The Summoner: High priority target; if not killed quickly, the screen will be overrun with minions, tanking your frame rate and your health.
7. The Laboratory and Neural Links: Permanent Progression
Outside of the waves, the Laboratory is where you fine-tune your "Neural Links." This system allows you to spend rare resources to gain permanent percentage increases to your stats. The most efficient path is to focus on "Starting Trait Selection." By upgrading your "Initial Intelligence," you can start the game with a high-tier trait already unlocked, significantly smoothing out the difficult first 60 seconds of a run.
Furthermore, the "Neural Link" allows for specialized builds. If you prefer a "Glass Cannon" playstyle, you can dump points into "Crit Damage" and "Evasion." If you struggle with dodging, focus on "Damage Reduction" and "Health Regen." However, be warned: Evasion is RNG-based, whereas Damage is guaranteed. In the ultra-late game, the "Invulnerability Window" after taking damage is more valuable than raw HP.
8. Resource Management: Gold, Diamonds, and Blueprints
Zombie Waves is a marathon, not a sprint. Your diamonds should almost exclusively be saved for "Event Pulls" or S-Tier weapon crates. Spending diamonds on revives or gold is a common "newbie trap." Revives are better earned by watching ads or using daily free tokens. Gold should be funneled into your Lab and Gear upgrades, while Blueprints should be hoarded until you find an S-Tier piece of equipment worth the investment.
Daily Efficiency Checklist
- Quick Patrols: Use all your energy on Quick Patrols if you don't have time to play; this is the primary source of XP and Gold.
- Challenge Modes: These provide the specific materials needed for Gear Ascension.
- Arena Participation: Even if you lose, the participation rewards in the Arena provide the currency needed for "Hero Shards."
9. Hero Selection and Skill Optimization

The Hero you play as changes your "Ult" ability. While the default hero is balanced, heroes like "Jill" or "X-Man" offer specialized playstyles. Jill, for instance, focuses on "Healing Synergy," making her nearly unkillable in the mid-game, while X-Man focuses on "Critical Saturation." Match your Hero to your favorite weapon; a Crit-focused hero with a fast-firing SMG creates a "Crit-Storm" that can melt even the toughest bosses.
Hero Perk Tiers
- S-Tier: Heroes with innate lifesteal or invulnerability frames.
- A-Tier: Heroes with flat ATK or Crit Rate buffs.
- B-Tier: Heroes with gold or XP gain buffs (only good for farming low-level stages).
10. Advanced Kiting: The Geometric Theory of Movement
Movement in Zombie Waves is not random; it is geometric. The best way to manage a horde is the "Figure-8" or "Spiral" pattern. By moving in a tightening spiral, you force the zombies to cluster in a singular point, maximizing the piercing and AOE potential of your bullets. If you run in a straight line, you will eventually hit the edge of the map and be cornered.
Always keep an eye on the "Spawn Density." If you see a gap in the incoming wave, move through it to reposition yourself in the center of the arena. Being "Outside" the horde is safe, but being "Inside" with high AOE allows you to collect XP gems faster, leading to quicker level-ups and a more powerful build.
Conclusion
Mastering Zombie Waves requires a shift from reactive gameplay to proactive strategy. It is a game where the synergy of your Laboratory upgrades, your Hero’s unique skills, and your in-match trait fusions create a mathematical "breaking point" where the player becomes an untouchable force of nature. By prioritizing offensive scaling, mastering the "Figure-8" movement, and hoarding resources for S-Tier gear, you can overcome even the most daunting infinite hordes. Remember: in the world of the undead, the only thing more dangerous than a zombie is a Tenno—err, a Survivor—with a maxed-out Voltgun and a plan.